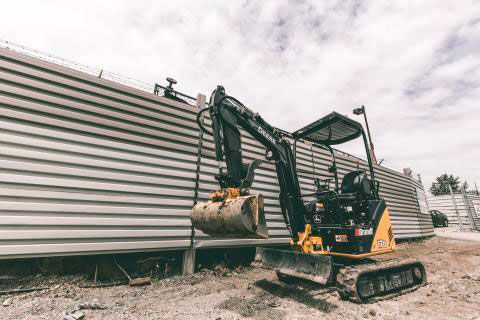
How to Operate a Mini Excavator
Mini excavators are used throughout the world for a variety of construction needs. Even here in North America where construction professionals and homeowners alike have a wider range of equipment options, mini excavators are perfect for many jobs. Fortunately they’re easy to learn to operate properly.
The Right Tool For The Job
Even among mini excavators there is a pretty significant size range. The smallest, most compact versions weigh fewer than 4,000 pounds—the average weight of the automobile in the US in 2004. Larger versions approach standard excavator sizes. Choose the model based on the project and the workspace: the smallest mini excavators can fit into even small yards and are more than enough for small landscaping changes or irrigation projects.

Your Bottom Dollar?
Fortunately, rental costs for mini excavators are affordable. In fact, you may well need to plan your projects based on labor costs, not on the cost of renting a mini excavator. Factor in pickup arrangements and fuel costs to keep your budget sufficiently roomy. Most mini excavators can be towed with a truck and heavy duty trailer; just check the weight of the excavator and trailer against the truck’s capabilities.
Show And Tell
Before you rent your mini, check out the rental facility in person. Most businesses will give you a demonstration, and this is the perfect time to brush up and clarify questions that you might still have with a professional who is well-trained on the machine. Take advantage of a skilled person supervising your demonstration and learn as you go.
The Fine Print
Every piece of equipment has an operator’s manual; always read it. You need to know exactly how each control is described, what it does, and where it is. Although there are some fairly standard design conventions within the world of mini excavators, you should always be aware of small variations that could trip you up as you operate the machine. And anytime a piece of equipment has specific, detailed warning stickers and labels in place, read them! You will probably also be able to look at maintenance records for your mini, so do it.
Dry Run
When you have your mini excavator in the vicinity of the project, give it a dry run first. Choose a place that’s level, free of debris or clutter, and away from existing work. These machines are typically well-balanced, but turning over is still possible. Get used to the footprint of the mini excavator before trying to maneuver it into tight spots where work needs to get done.
Final Check
As with any piece of heavy machinery, give it a once over before you start. You’re looking to make sure there is no damage, no loose or damaged cables, no drips or leaks, or other possible issues. While you’re at it, check your coolant and lubrication levels and safety equipment—as you would before operating over heavy equipment.
Learning The Ropes
When you are seated on the mini excavator you will typically have a control assembly and arm rest on your left; this will usually move to allow you to access the seat. Given that it moves, make sure the control assembly is safely locked into place before you begin work. To your right you’ll see the ignition key or digital keypad, as well as various gauges.
The joysticks in a mini excavator control the hoe or bucket/boom assembly as well as the machine rotation function that allows you to move around as you go. The joysticks should start in neutral. Between your legs you’ll find the drive/steer controls which let you move ahead as you work. Before you get rolling, start by moving the controls slowly and in a controlled way so that you don’t lurch around.
Finally, there are two controls near your feet that are less frequently used but still important to understand. The high speed control is to your left, and is usually either a button or pedal to be pushed by your left foot. Only engage this control when you’re traveling fairly straight on level, smooth ground. To your right you’ll see a pedal under a metal plate cover; this swivels the how in either horizontal direction. In the cluster of instruments on your right side you’ll find the throttle and the dozer control. You can use the blade controlled by the dozer control to fill in uneven ground and grade your target area.
Get Going
Remember, once you’re in motion be careful not to jostle any of the controls. Move forward and maneuver with both the hoe and front blade raised. Whenever you are in motion, continuously scan the area to mind the location of the hoe and blade. Practice digging using the joysticks in track hoe or back hoe mode.
You can lower the blade by using the right front control handle. You can first raise and lower the main boom section by pulling the right joystick back towards you to raise it, and by pushing it away from you to lower it. The right joystick also scoops by going left and dumps by moving right. One of your most common motions will be to lower the bucket into the earth and then scoop toward you by pulling back on the left boom, and then dumping the soil into the bucket with your right stick moving toward the center.
The Bottom Line
Remember, there’s no way to “train” yourself in advance; you just have to get into the mini excavator and practice. You’ll find that you end up moving each control without planning ahead as motions become second nature to you.

